Monday, July 25, 2011

Post It Party

Who doesn't love a good party and who doesn't love post its??

The lovely lady over at Create Teach Share is hosting a linky party about how you use post it's in your classroom.

I use post it notes the same way as the next teacher girl (or guy).
Some **different ways** I use them are... to cover words that children get stuck on to have them read through the sentence during G.R. To write out the syllables of tricky words. Also since I've been tutoring and don't have my arsenal of teaching supplies when playing sight word bingo, you can use the tiny post it notes to cover the words.

Head on over to Create Teach Share and link up!!

Saturday, July 23, 2011

Everyone loves freebies!

back-in-action-giveaway-time.html.png

Hey head on over to Miss Bainbridge's Class to check out her flippy books give away! She's giving away different sets of books, your choice with up to 4 winners! Go check it out! Nothing like a Mid-Summer give away to perk up the old teaching spirit!


The Ultimate Sticky Buns


I love to bake. While I'm not always the best at somethings....Pie crust you foil me again! There are some things that I rock at... Ultimate Sticky Buns being one of them. The recipe is brought to you courtesy of Cook's Illustrated All Time Best Recipes.

I've subscribed to other magazines, I've used other cookbooks. I should know better, because time and time again I end up back with Cooks Illustrated materials they are the best, especially when they use color pictures.

The dough is twice raised, which means they are twice as yummy and will be eaten twice as quickly!

The recipes makes 12, 3 1/2 inch buns

Dough:
3 large eggs @ room temperature
3/4 cup buttermilk @ room temp.
1/4 cup granulated sugar
1 1/4 teaspoon salt
1 envelope instant yeast
4 1/4 cups unbleached flour
6 tablespoons unsalted butter, melted and cooled

Carmel Glaze
6 tablespoons unsalted butter
3/4 cup light brown sugar
3 tablespoons corn syrup (light/dark)
2 table spoons heavy cream
Pinch of salt

Cinnamon-Sugar Filling
3/4 cup packed light brown sugar
2 tablespoons ground cinnamon
1/4 teaspoon ground cloves
pinch of salt
1 table spoon melted butter

The recipe also has a pecan topping, which I skipped because I thought the carmel glaze would be enough and...it was :)

Making the dough
1. Using a stand mixer, whisk eggs then add buttermilk. Add in the sugar, salt and yeast. Add 2 cups flour and butter, use a spatula to even out dough. Add all but 1/4 cup of the flour. Use the dough hook and knead on low for about 5 minutes. Be sure to check dough, add flour if too sticky. Knead 5 minutes longer. Place dough on floured surface, knead by hand for about 1 minute. Spray large bowl with nonstick cooking spray. Put dough in bowl and light spray top of dough. Cover with plastic wrap tightly and set in a warm place until doubled in size about 2 to 2 1/2 hours.

2. Make glaze.
Combine all ingredients in a small saucepan. Heat on medium whisking until butter is melted and mixture is combined. Pour glaze into 13x9 nonstick metal baking pan, tilt pan and use spatula to cover the surface.

3. Assemble and bake.
Combine all dry ingredients in the filling. Turn dough out on floured surface. Stretch dough into a rectangle then roll out until it measures 16x12. Brush dough with 1 tablespoon of the filling butter. Leave a 1/2 inch around the edge for sealing the buns. Also brush side of baking dish. Place filling mixture evenly over the dough. Begin rolling the dough starting on the 16" side. Roll the dough until the seam is down and the roll is pushing down on it. Flip dough and pinch the end of the dough and the roll together. Flip back on its seem. Cut log in half, then in quarters using a serrated knife. Cut each quarter into 3 buns.

Arrange and rise
4. Arrange the buns in a 4x3 array in your metal pan. Cover tightly with plastic wrap until puffy and pressed against each other about 1 1/2 hours. (If making these ahead of time you can "proof them for the 1 1/2, then refrigerate till the next morning) Put oven rack in lowest position. Heat oven to 400 degrees.

When ready to put buns in, lower temperature to 350 degrees. Bake until golden brown, or internal temp is at 180 degrees about 25-30 minutes. Cool on wire rack for 10 mins. Invert the pan onto a cutting board or large plate. Scrape extra glaze on to buns.

5. Pull apart and serve, eat quick because they'll go quick!


** Buns can be refrigerated in plastic wrap for up to 3 days. Reheat in microwave about 2 mins or in the oven 325 degrees for 8 minutes.**

Craft Blog

It was love at first blog....if you like easy, fun to look at crafts head on over to


I'm all about the glass jar/tape decorating tutorial....

Grade Level Link Up Party


While flipping around Pintrest on this steamy afternoon I came across a link to this blog. The Teacher's Lane.... who happen to be having a Link Party sorted by grade level.

INGENIOUS! Right?

So head on over to The Teacher's Lane check out the blogs, pass them on to your friends, link up your own blog and when we get rain again (someday!) you'll have a rainy day activity! Enjoy

Gratitude is one of the best emotions

I have 10 followers in 7 days, yippee!!

Thank you! Thank you! Thank you! If you've started following me, linked up to my blog or commented on a post!

At this rate I'll be a first class blogger in no time!

I'm hoping to pass 100 followers by the first few weeks of school in September. I have some great blogs planned for when the school year starts. My only delay is that I can't get into my classroom and if we could peek into my classroom it would appear as if a new teacher were moving in there, because I strip that thing down at the end of the year.... nothing like a spic and span classroom to start the year off. So let's plan on more great things to come from It's Elementary My Dear Teacher.... including a blog theme update once I am back from my Disney vacation!

Friday, July 22, 2011

That would make Miss Triebel.....???


The last week of school my two sisters came into help with a tie dye t-shirt project. Which completely rocked and plan on doing this year at the beginning of the year and then have room spirit days with our shirts.

My middle sister Jaclyn, just graduated high school and is going to college to major in illustration. My youngest sister Katherine and I joke that Jaclyn soaked up all the art genes in the gene pool. When we were finished with the t-shirts there was a little bit of time before the end of the day so they start asking my sisters all sorts of questions; i.e. What's your favorite Harry Potter book? What is your dog Jake like? What is Miss Triebel's dog like?

So one student asks if Katherine is a good at sports. At 5'10" Katherine is great at most sports she tries. She plays volleyball and rows crew at our high school. They ask Jaclyn if she is sporty. Needless to say, she is admittedly not.

So then the question comes up...If Jaclyn is good at art and Katherine is good at sports. What is Miss Triebel good at?

One of my students yelled out she's good at being a teacher (Thanks Guys!). But it got me thinking. My Dad is an engineer. I think in some ways I got his engineering brain (certainly NOT the math part) but the how things work, the way things fit together, how to take things apart and put them together...which by proxy makes me good at putting Ikea furniture together AND crafts.

So that day we decided Miss Triebel is crafty. So here is my first craft blog, not too applicable to the classroom but certainly a fun and easy craft for anyone!

Sea glass Shadow Box
I used my favorite pieces of sea glass here, given to me by a friend.

Materials:
sea glass (clearly you could do this with seashells, rocks, etc.)
12x16 art canvas (any size can be used)
E6000 craft glue
pencil
shadow box frame

1.) I started by arranging the sea glass by color on one of the extra boards I had. I started with the brillant blue, the blues, blue/greens, whites, white/greens, olive green and bottle green. I arranged them on the other board in the rectangle and in the way I wanted them.

2.) I took a pencil and marked off 2" in from the edge on each corner to create the rectangle that would be used for the sea glass.

3.) I used the E6000 glue, which comes out like hot glue--kinda of all over the place, and not when you expect it, grab extra paper towels! I glued in the 4 corner pieces first. Putting glue on the board and on the back of the glass pieces and letting them "set up" for 2 minutes. I then glued them on to the pencil marks.

4.) I then took the top part of the rectangle and started glue the "head" of each line in, using the same glueing procedure. Then I did the same for the bottom "foot" of the rectangle.

5.) Finally, I started with the left hand row (blue glass). I put the glue dots down on the board and then arranged the glass with the glue on the back under the second row, so I could see where to place them while they set up. When, they were all set up I just "flipped" then over into their places. I used a q-tip to wipe up any misplaced glue.

6.) I let it dry for a day or 2 before, putting it into the shadow box.

**Note about E6000, I had never used this glue before but had seen it used on many craft blogs. I really liked it and would use it (with the windows open) in my classroom if need be. It does ooze from the tube quite a bit. It does not dry super quick (I was thinking it was more like super glue...it's not that quick), if you get it on something it shouldn't be on...table, your sunglasses :o/... it will roll of it like elmers glue, if you just rub at it. Overall, I was really happy with the results and the product.


Buyer be ware in the back to school aisle....

So it's about 9,000 degrees in the Northeast today, and while I love the sun, and the summer. I certainly laying low today and hanging out indoors. It's been like this most of the week...so I decided to swing by my (not so) local Target to check out the dollar spot and (please forgive me for saying it) the back to school section. Summary of these events...

What in the good Lord's name was I thinking.... The panic set it!

I happen to be reading Abby's blog The Inspired Apple today, about her trip to Target. This is one of her pictures from her blog-
The Roseart crayons for .99 cents...already gone! I start to panic. What am I missing out on???

Composition journals for $1.00... A DOLLAR! I must need these and that's when I catch myself.

I'm a list maker. I made a list at the end of the year of the things, and ONLY the things I will buy for my classroom this year. I also took a last look at our POs to see what we did order supply wise.

I realized this after the amount of money I spent last year on school supplies and the amount of "stuff" a.k.a JUNK I had hidden on the shelves in my classroom.

So did I need those spiffy new dollar composition books? No. Did I want to buy them? Yes. A situation could arise where I may need them! Putting my supply anxiety aside, I revert to my list and try to stick to it. Also our PTO gives us some money to help offset our supplies every September. I try really hard to use this money to the best of my ability and not dip into my money when buying school supplies (ha ha ha ha flash to my making 20 tie dye shirt, all of the supplies I bought for my class this past year....)

We ordered 3 different types of journals this year. I think I'll be all set. Crayons, I still have a box of 500 crayons from 6 years ago, that I have as a back up. Furthermore I still have some of the crayons from last years class that I have yet to take care of. Our students do bring in some supplies and generally I ask for crayons, so I know I'll be all set. The panic subsides.

I should note that my list does change as the summer goes on but I try to substitute when needed, not add to.

So the moral of this story is:
1.) Go with a plan.
2.) Know what you already have.
3.) Know what you need, and buy ONLY what you need.
4.) Substitute on your list, try not to add on to it.
5.) Just because it's a bargain, doesn't mean it's a real bargain especially if your not going to use it!

My TTB (things to buy) school list looked like this at the end of June:
* new Carlson-Dellosa job pockets and cards
* laminated sticks, for choosing students etc.
* fabric to cover 2 paper bulletin boards
* Steps to literacy Desk Plates ( I loved these and so did the kids)
*Rainbow color Expo dry erase markers for (my) whiteboard

My TTB school list now looks like this
* 1 bag wood rectangles from Woodworks Ltd.
(I'm going to make permanent job magnets instead of spending $10.00 a yr on cardboard that I end up sending home with the kids. See the tutorial at Matsutake blog for printing with an inkjet printer on wood blocks)
* 20 magnets to put student names in (purchased at Joann fabrics $1.00 each with a 20% coupon last weekend. These are to go with the job magnets.) (More to come on items 1 & 2 once I get in my classroom)
*Dog wooden craft sticks (to go with my Up theme)
*fabric to cover bulletin boards (purchased at Joann fabrics this past weekend with a 20% off coupon)
*Rainbow color Expo dry erase markers for classroom whiteboard

Additions:
*3m laminator
*Up banner for outside bulletin board
*New clip art package from DJ inkers for bulletin board

While I am spending more on the wood blocks etc. they are something I will use over and over again. So the one time purchase is more than buying a cardboard job bulletin board set, but after one year of use, I will have re cooped that money. Also, by not indulging in buying those composition books helps to afford my new laminator.

Tuesday, July 19, 2011

Cool Tips Linky Party

Belinda over at Too Cool For School is having a Linky Party about Cool Teacher Tips. So while I don't think any of my tips are ground breaking....they are pretty useful.

Tip 1.) I give all my students PIN numbers like many teachers but I do it by first name. No more wracking your brain at 9:30 on Wednesday night as to what Johnny's last name is.

Tip 2.) To remove adhesive on book boxes, new books, pretty much any surface, use a blow dryer it heats up the adhesive and removes the sticker and tacky stuff in one move.

Tip 3.) When you're writing all you student's names in alphabetical order by first name (see #1) using a sharpie and you make a boo-boo on a semi-laminated or laminated piece of paper, use hair spray to remove the boo-boo!

Tip 4.) Always put your name in everything. And when someone (especially a teacher) wants to borrow your stuff write it down somewhere reliable... initials on the board, a post taped to your desk, a notebook.... then there will be no running around look for your First Six Weeks of School book, who borrowed that or do I have that? debate.

Tip 5.) Mr. Clean Erasers are a save all. I ask for them on a wish list at the beginning of the year. Pencil, crayons, markers it takes it all out. And if by chance you have a smartboard and one of your little angels takes a regular marker or dry erase marker to it.... Mr. Clean has got your back. Seriously a life saver.

Tip 6.) Post it White Out Tape. Tape not a liquid=hours saved waving papers in the air to dry before coping them, more time to blog etc. (Don't leave this laying around the copy room, it'll disappear!)

Be sure to check out Too Cool For School and link up to the party!!


Name Update

I'm a brain racker I'll admit it.

I over think things. I'm a girl.

I've been trying to think of a witty name for my blog for.........Mmmmmm Ever!

My first blog for my parents had been named the Triebel Telegraph, as a homage to Jimmy Buffett Coconut Telegraph.... "You can here it on the coconut telegraph... this and that, this and that"

But I decided I'd like something more catchy. Considering my love of the beach, and classroom beach theme, I thought Sunny Days in Second grade would be excellent! But during a linky party I discovered that someone else already had that blog name, and not wanting to steel someones thunder I resorted back to The Triebel Telegraph....

However in my blog stalking, I saw a blog using the name primary, which reminded me of elementary and a la Despicable Me.... LIGHTBULB! So here we are, welcome to It's Elementary My Dear Teacher....

Let's take her out for a spin and see how it goes...

Monday, July 18, 2011

Target!

Who doesn't love Target? And who doesn't love the dollar spot at Target?

Well these two great ideas combine, over at Target Treasures who is hosting a $20 Target gift card give away. Head on over there to check out the goods and enter in the give away.

Don't forget to Follow my blog and Target Treasure's blog too!

Splurge vs. Steal

Who knew?? My post coincidentally also fits a Linky Party! Yippee.. Head on over to Mrs. Bee's website to check out Mrs. Bee's buzzing website!


I'm racking my brain here to keep my classroom fresh and motivated. I'm always looking for a new idea. I love this over at Clutter Free Classroom. It seems like it's a great management board, easy to use and up keep and not a lot of things to buy and maintain.

I think that's the true theme in my room, less waste--- paper wise, money wise, time wise.

That being said I'm all about the classroom incentives. Starting after Christmas I use a class bank system, where children bank money towards a store at the end of the year. I love doing this but, it's not practical to start that the first week of school. Also this management board is easy enough I can run both at the same time in theory.

In the past I've used tickets. Everyday a child goes without a strike they get a ticket, we put it in a fish bowl and I draw out 3 different names to choose a prize from the prize bag a.k.a the Oriental Trading junk box.

Call me crazy, but aside from giving the kids....what we all know to be junk... I'm not thrilled of giving them god knows what made in China made with who knows what kind of paint. I never used to think of these things but my teaching neighbor (and good buddy Michele) is someone who thinks of all these things and since my Mom had cancer, I have to say it certainly makes me think twice about things.

So I'm formulating a plan. To start off the year I am going to make my own management board like the one at Clutter Free Classroom, use the clothespin idea (because I have about 10,000 clothespins sitting in a ziplock bag in my room) but there are those kids who always go above and beyond. There are those kids that have a good rebound after a speed bump, and generally in those cases I like to send home a quick note or more often I send a quick email to the student's parents to tell them the great news.

**SIDE NOTE- The first two weeks of school, I contact every parent with positive news about their child. I try to get as many by phone, but many I catch up with on email. I think it creates positive conditioning that way our first true interaction isn't about something their child has done wrong or it's not "Ohhh no Miss Triebel is calling home!"**

However, I'm realizing I can circumnavigate some of this with these nifty inventions. Somewhere on Pinterest (can't find it now, of course!) there was post about using strips of paper and tape to create a paper bracelet as a reminder to bring in books, homework whatever it might be.

I love the idea, but come on teachers let's be realistic...

Paper...........taped on to a wrist or backpack, in bus line at 3:30 on a rainy day.... I see paper pulp laying on the front sidewalk after little Johnny has gotten on his bus. So I start thinking high tech.... concerts, clubs, Ty-Vek bracelets!

Then, those handy people over at Really Good Teacher Stuff...boy talk about networking, talk about canvasing. I get at least one catalog at home, when I swung by school last week there were 4 in my mailbox and I get a biweekly email from them... I get the picture folks! But while lying by the pool I saw these handy bracelets and that's when my other LIGHTBULB!!! went off (I love Steve Carrell in Despicable Me!).
But at $6.99 for 90 strips, each one costs a measley 7 cents a bracelet. But if you hand out one a day you'll be out 1/2 way through the year...that's no good. Nothing like building the kids up into something and then ditching it.

So 7 cents are our splurge because in theory you'd be buying at least 3 boxes. So let's call it $21.00 and 270 strips.

Now for our steal... again I revert to my friend Google- "Event bracelets"
I stumble upon this great website Wristband Express.

So I'll skip to the good part, each box of bracelets contains.... 500 bracelets. This could be a two year adventure. I could even use them as reminder bands AND incentive bands because with 500 there is little chance I'll run out... (500/180 is 2.7 bracelets a day) so maybe I could run out we'll have to see how this plays out.... any ways on to the money.

We have some options here... Low ball-

In 6 different colors (neons) and 6 different non-neon colors, there are plenty of options. The cost $16.00 a box. If you can get your whole building in on it, if you order more than 20 boxes the price drops to $14.00 a box. The cost per bracelet are you ready to be SHOCKED??? Is 3 cents a bracelet! 3 cents! What teacher can't afford 3 cents for classroom incentives?

High ball option:
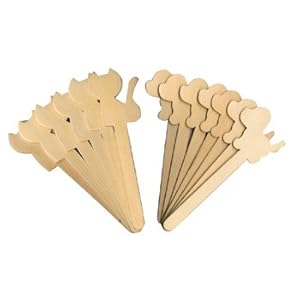
Maybe you think solid colors are boring. They have some great patterns too. Waves (I'm not going lie I'm drawn to theses bad boys at 16.50 a box (still 3 cents a bracelet).
They also have tie dye, smiley faces, rings, lightening bolts, American flags, ducks, fish, geckos, tiger stripes, stars, checks, stripes, camo, pawprints, footballs and penguins. All ranging from $16.50 to $18.00 (still 3 cents each).

They also have a "variety pack" of colors. You could color code your bracelets. Purple for a job well done, red for reminders??? The Variety pack in regular is slightly more expensive at $26.50 a box, but still 5 cents a band.

So I hoping it's clear in everyone's mind that this is a real steal. Even if you figure in .99 for a sharpie to write your message. Also I'm speculating here, but I bet stickers would adhere pretty well to these.

And while my second graders are little old for this... some of K-1 friends might find these useful the first weeks of school....


Lightbulb!


If you've seen Despicable Me, I hope you know what I'm try to say.... "Lightbulb!"

For years now, I've been milking the beach theme, and while I LOVE the beach (come on look at my blog!) I'm getting a little *bored* with it. So I'm sitting here, flipping around Pintrest and just like that ... **LIGHTBULB**!! I've decided that this year, I am going to do an UP! themed classroom.

I head over to my BFF, Google to search for Up. However, I'm sure you can guess where that went. By searching for Up themed parties (or throwing in the word Pixar) I get some good results. I also used Pintrest to help me hunt down some more themed items.

For the bulletin boards outside my classroom, I'm thinking "My Adventure Book", maybe some character cut outs, and certainly some use of this banner....I'm thinking maybe suitcases with the kids names on them....??
We do Responsive Classroom Hopes and Dreams for second grade the first week of school, I generally do these on some white papers with a cloud on them. I'm thinking maybe throw a colored paper balloon in there to spice things up.

I also buy laminated name sticks, generally with a fish on them but I found wooden craft sticks with dogs on top of them. Dug anyone?

The kids can color them, I'll put their names on them and then when we have to make groups, call on someone to give an answer etc. I use the "Cup of Fairness".

I have the Up soundtrack so I can play that on the first day of school when the kids arrive. I'm also thinking of getting an Up mylar balloon or something of that theme, as we can't have latex because of the allergies.

I'm thinking Up name tags too for the first day of school. I don't want to go OVER BOARD but I don't want one lame bulletin board and people wonder what in the world I was thinking.

I'm open to any suggestions you may have about my Up theme!

Sunday, July 17, 2011

Favorite Picture book


Another link party.... I'm just partying it up over here at the Triebel Telegraph.... actually I'm hoping for more followers. I'm networking here people!

So normally for a linky party I spend all this time thinking about what I'm going to write but when I read this prompt, I didn't even have to think. I just knew. Like a good melon.


The book: Beach
Author: Elisha Cooper (I'll save you the trouble and tell you that this is a male author)
Medium: Watercolor and pencil

Before I tell you about the book, I'll tell you I read this every June to my class. They look at the pictures and inevitably one of the students will say "Miss Triebel that looks just like our local beach" and I agree with them. So this year I happen to Google Elisha Cooper and start to read up on his work. I see he went to Yale. My town is close to Yale.

I see on the book flap that he lives in Chicago now and then pay dirt... on his website it says he went to Lake Michigan to research this book AND he went back to his childhood beach in Connecticut to do more research. I wrote him an email (in June) to ask if his beach was indeed our beach, but haven't heard back from him :( but in my gut I know it's the same beach. I've lived here my whole life I know this is my beach....

This is one of my favorite pictures, it's actually 2 pages... looks like nautical wall paper!

The whole book is illustrated in model form, where the people have no "faces" they look like those wooden art models, its about a typical day at the beach the people that come, what they do, the gulls eating food, the lifeguard swinging there whistle. It is Americana. It is summer time. It is one of my favorite parts of teaching :)

And my favorite line from the book sums up summer, and I think summer for most teachers.

"As the sun sets, and the clouds change color, the beach empties. A last jump in the water, another last jump. Then up the sand and over the dunes with a stop at the outdoor shower. Sand is everywhere- between toes and in bathing suits and inside ears. Inside, too, is the motion of the waves, the knowledge of a day well spent, a day to remember when is the beach is far away."

Be sure to head over to Clutter Free Classroom to check out this Linky Party and the whole weeks worth of Linky Parties they have going on there...for the party animal in us all!
http://clutterfreeclassroom.blogspot.com/

Things I could not teach without


I feel like an 8 year old in my class, I want to yell out "Miss Triebel you can't teach without us!!" and that's for sure the kids are a key component here!

Here are the things that make my day teaching that much more groovey....


1.) My Smartboard. When I get back to school (and my school labtop) I'm going to post lots of my Smartboard lessons. I love my board and so do the kids. We do everything on here, from Morning Meeting to Friday Funday Funny Videos. It is the kitchen of my classroom where we all come to gather.

2.) Every morning. Green tea. Gets the metabolism up and going.

3.) Scholastic's The Complete Year in Reading and Writing in 2nd grade. Working in a district that doesn't have a specific scope and sequence, this helps win the planning stages. While I certainly do not teach directly from here, it does make planning, organizing, collecting books for my fairy tale unit A LOT easier!

4.) The stock pile of hershey's kisses in my 3 draw plastic tower (my desk). Needed on Thursdays around 2:30.

5.) Magazine boxes. In my "teaching closet" because I have one closet (good joke huh?) almost as good as the ONE electrical outlet I had the first four year of teaching... cue Green Acres music. Now that I'm all electrical plugged up with my Smartboard.... in my closet I have a cardboard magazine box for each month and in that box I put books I use for the month and large items that don't fit in my 3 ring binder for the month (ie December, my Elf glyph because the tracers are too big). Everything is all sorted out, so in September I can pull out Jack's Talent, Bucket Fillers, Please is a Good Word to Use and The Amazing Chowder and know exactly what lessons I am going to do.

6.) My amazing teaching neighbors (K,1,2) whether it's a book, a DRA form or someone to watch my class when I HAVE to go to the bathroom, they make the days fun, entertaining and certainly enjoyable!

Teacher's bag of tricks....or websites


Here is one of my favorite math websites....whenever I need a Friday Funday Math lesson (On Friday's we skip our journal based learning and try something a little more hands on....) I go directly over to the great people at Mathwire.com

I know lots of people sit around and make up multiple verisions of "I has, who has" or even more horribly go out and BUY them.... Why do that? When you can get them for free here!

My favorite discovery at mathwire, aside from their cute seasonal glyphs, and I always love a good glyph. Is their game Contig and Contig Jr.

We play the Junior version in Second Grade. I send it home, as homework on nights when the copy is down and I couldn't copy what I wanted (I always have a stack of these ready to go). I sent them home with the summer work packets. We play it during station time, or as a Menu Item. And I've found that after one or two plays the kids get it and they know how to play with little intervention from me. On the day we have an odd number, I'll play with one of my little friends and it even gets me thinking hard! It's an all around fun game, that my class will beg to play!

Best of all they are building fact fluency and they don't even know it! So much more fun and engaging then flashcards (boooo! hissssss!)

All you need is 2 die, and 2 colored crayons...some friends might need a number grid or number line to help them out. Check out both versions here. Can't say enough wonderful things about Mathwire. :)

HP


So this is my teaching blog, but today I must digress from teaching. Why? Harry Potter is the answer.

I have been reading the Harry Potter series since they came out when I was in college. I talk about it at school with my second graders, as some are reading the books with their parents as a read aloud and many have seen the first couple movies (I always cringe when they tell me they've seen the last few, because those are even scary to me!)

Today I went and saw the final movie. I cried. I literally sat in the movie theater crying. Not just because Harry misses his parents, and that they are always "right there with him". But because having read the series there is an emotional attachment to them. I was so moved but the whole story. It was certainly one of the best movies I've ever seen. It was the most visually engaging movie have seen. It was a constant "what will happen next" (even though I know, I've read the books!)Not to mention it grossed $168.55 million dollars this weekend,breaking box office records for single weekend opening and I'm sure for over all grossing.

I was sad to see it all come to an end today. But what a way to go.... they certainly went out on top, and with a bang.

And though I highly doubt J.K. Rowling needs anything in her life, certainly not any money. I think that we teachers owe her a bit of thanks for making reading exciting again. For breathing new life into something. Harry Potter became the Treasure Island for kids like my sister who are going off to college. They grew up on these books, and got lost in the adventure and certainly have lit the way for more engaged reader to come. So I say "After all this time? Always."


Lesson Plan book (updated)

Here is a Google Docs version of my lesson plan. Seriously the best time saver ever, is to make something you will actually use. That and the not having to write down your specials for the sub.... ingenious I tell you :)


Another linky party


1. A blogger who is a "New Kid on the Blog"
(Let's say someone who has blogged 2 months or less and has less than 200 followers

2. Post a blogger in your same grade level

3. Post a blogger in a different grade level

4. It's all about the button. Find a cute blog button and post it.

1.) A new kid on the blog....shameless self plug. While not new to blogging, I am new to teacher blogging....

2.) In my grade level~

3.) From a different grade level...

4.)The Moffatt Girls

That was easy and fun! I'm also so exciting because I have a follower! Just one but I'm sure more to come yippeee! Can't wait till I can get back into my building and start posting all the great things that are saved up on my school computer!

Oh the things we say....


1. This is my first Linky Party Yippeee!!! I'm hoping this will help me get some followers!
2. I was so happy I found Christina's website last year she's got great stuff on there, I knew this year for my own personal goal I needed to fire up a teaching blog. So here we go...

Things I say that are repeated by my students and then told to me by parents at conference time....

1.) Good Grief Charlie Brown!! ( I must say this 1000x a day, every time a speed bump occurs and apparently a lot of my students now use it at home!)

2.) Oh rats! A good alternative to other choice "adult" words.

3.) Oh Banana Sandwich! Another good alternative!

4.) Is that a just right book? If they leave 2nd grade doing one thing it should be, being able to pick out a just right book

5.) Yes you have to sit in your parking spots on the carpet. Those kids, always trying to outsmart me on the parking spot situation!


Head over to Mrs. Bainbridges blog to join her Linky Party!

Thursday, July 14, 2011

Lesson Plan Book

Does anyone have this problem?


It’s the middle of summer and I’m thinking about September and school (that’s not the problem). I’m thinking about my plan book. I’m thinking about buying one. I research. I go to teacher stores. I mentally insist that this will be the year I will USE my plan book all year, and that I will find a plan book that I absolutely LOVE.


Reality check!


This never happens. I’ve tried all sorts of plan books but it never happens. Or I get all excited about the plan book that I just dropped $10 bucks on and then upon trying to use it, fall flat a month into school....ok really like 2 weeks.


I’ve decided that plan books are like homes, and you’ve got to make them your own. So that’s what I’ve done. This also really helps with sub plans, since everything is already laid out just the logistics need to be filled in (ie the math chapter/lesson/notes for the lesson).


I am using my Mac, so I used Swift Publisher (a great investment)


This is my weekly template. The whole week in one glance. The gray-ed areas are my prep times. I think this is easy, at a glance planning. This can easily be made using Microsoft Publisher, as well. I tried to use Word and Excel to make this in years past and well.... let’s remember the $10 I dropped on the book I never used.


I print out 36 copies front to back (18 pieces of paper). I then took it to Staples and had them spiral bind it for $1.06 and Presto! I have a great plan book I actual use.


Below is another version I had made but found it too cumbersome.


Finally, I typed up all the stuff I type over and over and over and over and over again when I have a sub. Then when I’ve got the 3 am fever, I don’t have to worry about where my sub plans are, are they on this computer and who can I politely ask to help me get my sub stuff together while I’m delusional in bed.

Now there’s no 3 AM panic, and I know everything is right there on my desk. I put other important info in there, class list, any medical issues, helpful students, my teaching neighbor’s names, fire drill procedure, extra activities. I created this 2 years ago, and now I take a few minutes in the summer to update the class lists, and any schedule changes and I’m good to go for the whole year.

**BONUS**- Save your plan book and next year you can at a glance see what exactly you did on the day before Thanksgiving, or see how ahead or behind you are in your math journal etc.

This year I’m going to have a student teacher, so I’m hoping she will find my plan book super useful and helpful!


Book Recommendations


The end of the year is a crazy time of year. We have learned so much. We have learned about ourselves and so much about our friends. We been working on synthesis, and really funneling down our ideas into one main thought or idea.


Students have been writing book blurbs about books they have read. We took that one step further and asked students to write book recommendations for their classmates.


Recommendations take a lot of brain power... you have to know yourself well enough to know what you would like and know the other person well enough to know what they would enjoy.


We did this activity during our literacy time for a week. We started with book blurbs, moved to writing recommendations, and then after a few recommendations we did recommendations conferences. Where the writer and reader of the recommendation get together and talk about what they enjoyed or did not enjoy.


It was a great way to wrap up our year and to showcase all of our learning.


Get your copy here... Book Recommendations